Setting Up Your Salesforce Integration in Outreach? Use These 5 Best Practices.

Find out the 5 best practices when setting up your Salesforce integration in Outreach from Lane Four's Outreach expert and consultant, Joana Lourenço.

Integration with Salesforce can be the key to making sales engagement platforms like Outreach successful. Since spearheading Lane Four’s work as an Outreach Implementation Partner, consultant Joana Lourenço has learned a ton about what makes this core integration work.

“There are a few things that people tend to skip when first setting up their integration,” says Joana, “but doing a couple of extra steps can make a huge difference in how Outreach will function as an extension of your overall data strategy.”

Luckily, Joana has agreed to let us in on some the secrets she’s learned after nearly 100 implementations. Do these five things when setting up your Salesforce integration in Outreach, and you’ll thank yourself later.

Pay Attention to API Limits

When you’ve connected the Salesforce plugin in Outreach, one of the first things you should do is check your API limit. Hitting an API limit in Salesforce is a huge headache—and it’s becoming more and more common as the tech stack grows. Hitting this limit in Salesforce with one tool will cause all of your other integrations to fail. For example, if you hit this limit in Outreach, your marketing automation system integration will stop working too.

To avoid this, set a threshold for API calls that’s lower than your overall API limit. This will prevent Outreach from syncing any more data once the lower threshold has been reached, but before you’ve gone over the actual limit. Outreach’s Salesforce plugin will show you your maximum API limit;  Joana recommends setting the threshold to about 70% of this API limit.

Beware that your initial Outreach sync may use up the a lot API calls (1 API call per record created). So, if you’re syncing 10,000 or more records initially, you may hit your API limit right away. Make sure you set a lower API call threshold before your initial sync, and you’ll avoid headaches on this front.

Learn More: Understanding API Call Usage

Set Up Your Custom Fields

If you need any of your custom Salesforce fields to be visible in Outreach, you’ll need to complete this two-step process:

  1. Create a custom field in Outreach and give it a label
  2. Use the Salesforce plugin to map your custom fields to each other

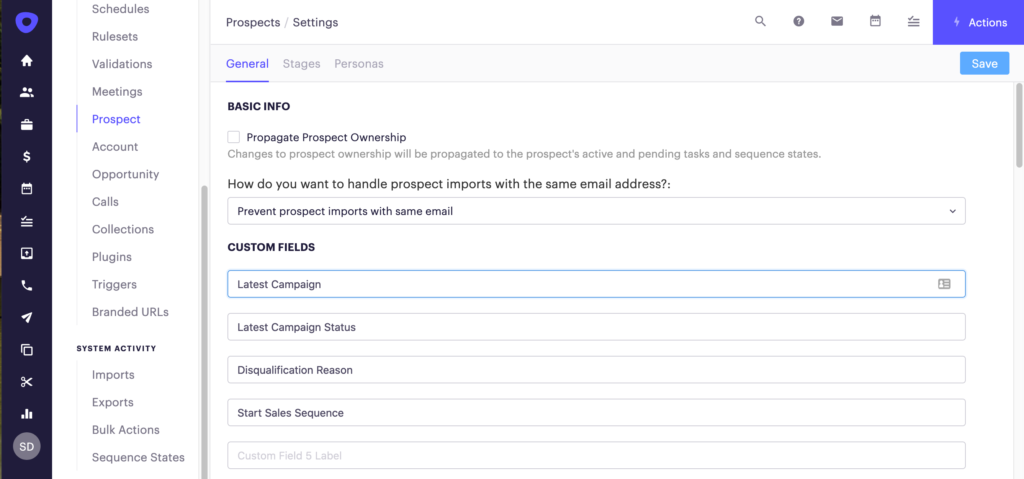
If you don’t map your custom fields before the initial data sync, it might take some time before you see this field information in Outreach. Individual record updates in Salesforce trigger record updates in Outreach. So if you don’t set up custom fields off the bat, none of the data from your custom fields will be synced until a change has been made to each individual record in Salesforce. This can be an issue if your reps are relying on information from custom fields.

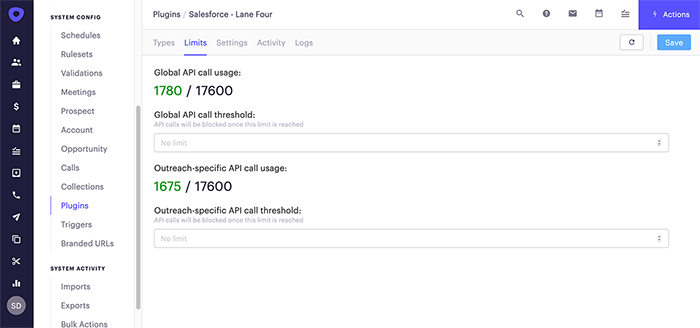
All of the workarounds for this issue after your initial data sync are time-consuming, and require using a ton of API calls in one go. Do yourself a favor and set up custom fields on prospects, accounts, and opportunities before you bring in any Salesforce data.

Manage the Opt-Out Field

Getting the opt-out process right has never been more important—especially in light of the privacy laws rolling out in 2020. Luckily, Outreach has built-in opt-out systems that can work great with some simple setup.

In the Salesforce plugin, Outreach’s Opted Out field is mapped to the standard Salesforce field called Email Opt-Out. But some organizations aren’t using this Salesforce field; often it’s not added to the Lead or Contact page layouts. In order to capture and sync email opt-outs between Salesforce and Outreach, you’ll first need to make the Email Opt-Out field visible in Salesforce and add it to record layouts.

It’s also worth noting that Outreach provides flexibility for opt-outs. Instead of a global opt-out, you can now set up separate opt-outs for email, phone, and SMS communications. If you want to take advantage of this feature, review your options in Outreach and make sure that all of your communication preference fields are syncing to Salesforce.

Whatever route you choose, make sure that you’re reviewing your opt-out strategy as a whole. Not only with Outreach and Salesforce, but also with marketing automation systems and anywhere else you’re storing contact data.

Learn More: Communication Preferences (Granular Opt-Out)

Set the Right Conditions for Inbound Create

When you first set up your integration, you may want to set conditions for which records to bring in from Salesforce. Before you go ahead and toggle the Inbound Create button to sync all of your data, pause to consider what you actually need to store in Outreach. As we all know, Salesforce can be rife with duplicates, outdated leads, and other information that’s useless to SDRs. Don’t waste API calls syncing unnecessary data.

Joana often sees clients set an Inbound Create condition around the lead or contact status field. You may choose to only sync prospects that meet the right conditions for SDR outreach—for example, qualified prospects.

Learn More: Salesforce Integration Toggles Explained

Need a Salesforce
Expert?


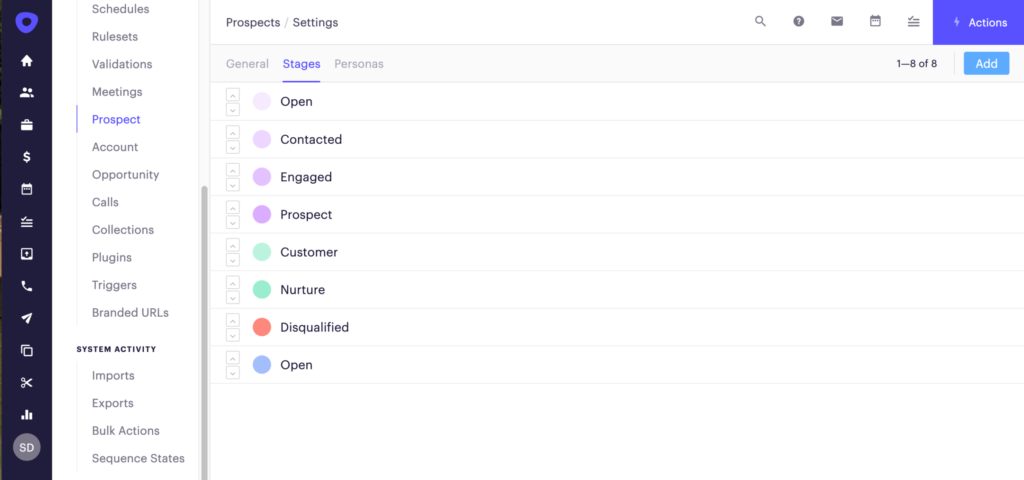
Be Thoughtful About Your Outreach Stage Values

The Outreach Stage field is important, and Joana recommends setting it up on day one. The majority of Joana’s clients map their Outreach Stage to the lead status in Salesforce. But unique lead statuses may not line up with the standard Outreach Stage values—for example, if your values are marketing-focused (like MQL, SQL, and SAL). In this case, you may want to create a custom field in Salesforce called Outreach Stage to capture this data.

If you’re syncing contact data into Outreach, make sure that you create a field to capture your Outreach Stage on that Salesforce object too. Remember that lead status is a standard Salesforce field, but contact status is not, and the values may differ. So make sure you’re syncing data from Outreach accordingly.

Bonus: Consider the Possibilities of Advanced Task Mapping

Tools like Outreach greatly expand the possibilities of activity reporting in Salesforce because they automatically generate a ton of accurate activity data. If you want to generate sales engagement activity reports in Salesforce based on Outreach activity, enable advanced task mapping within Outreach. In order to turn on this functionality, you’ll need to contact Outreach support. Then, you’ll be able to map task data from Outreach into custom fields on Salesforce’s task object.

Learn More: Advanced Task Mapping Overview