Why should you consider using Flow tests? In a previous post, we covered the fundamentals and shared our experiences on how embracing this practice has benefited us internally, with our clients, and why we strongly recommend it for anyone building Flows in Salesforce. But now, let’s dive into the “how.” Keep reading to discover how to set up and configure Flow tests effectively.
Time to Create and Configure Your Flow Tests!
There are two ways to set up a flow test for a record-triggered flow:
1) Create Scenarios for Unit Tests
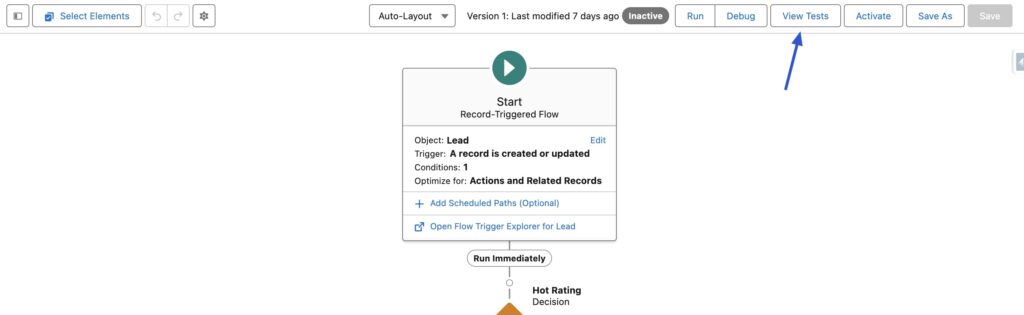
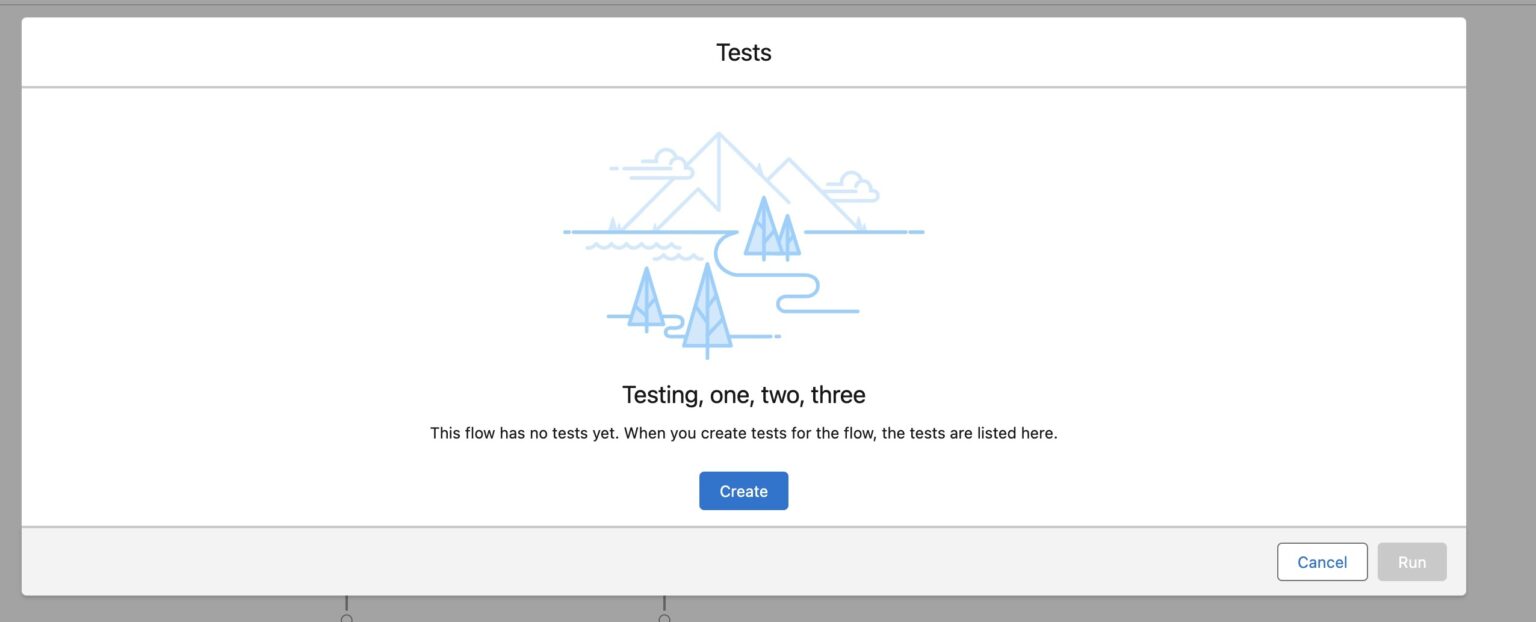
Open the Flow Builder and navigate to the specific record-triggered flow you want to test. Click on the “View Tests” button. This is the testing framework for record-triggered flows. If this is your initial setup for flow tests, you’ll be directed to a welcome screen featuring a “Create” button. Click the “Create” button to begin creating your first flow test.
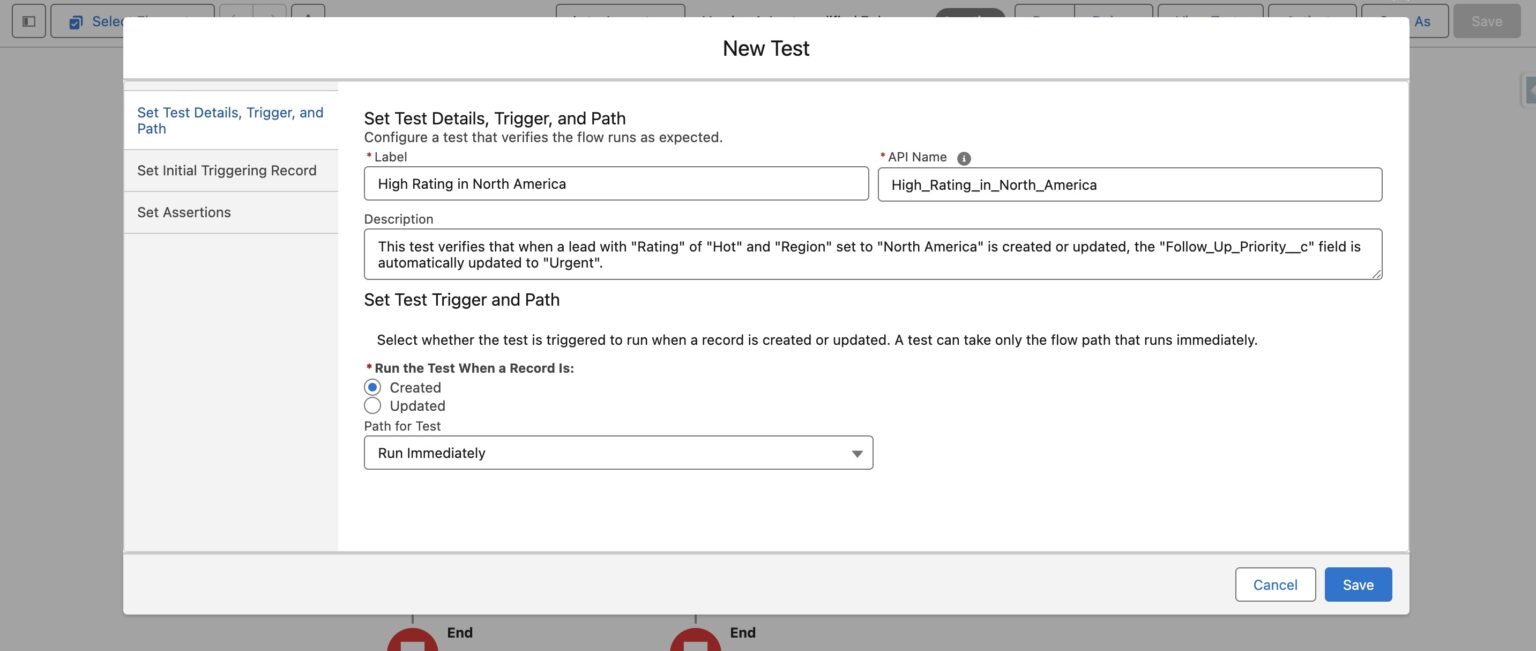
Step 1: Set Test Details, Triggers, and Path
- Add a label for your test. It is important to assign meaningful labels to each test case. These labels should accurately describe the scenario being tested.
- When you add a label to a test, the API Name is automatically generated by combining the Flow Name with the Test Scenario label. For better clarity and simplicity in identification, it is recommended to remove the Flow Name prefix from the API Name.
- In the Description field, provide a detailed explanation of the test scenario and clearly state the expected outcomes.
- Next, specify the trigger condition for the test—choose whether the test should run when a record is created or updated, depending on the specific scenario you are testing.
- Finally, select the “Path for Test” to determine which path within the flow should be executed during the test. This step ensures that the correct sequence of actions is evaluated to validate the flow’s functionality accurately.
Let’s set up a test for a scenario where a new lead is created, rated as High and located in North America!
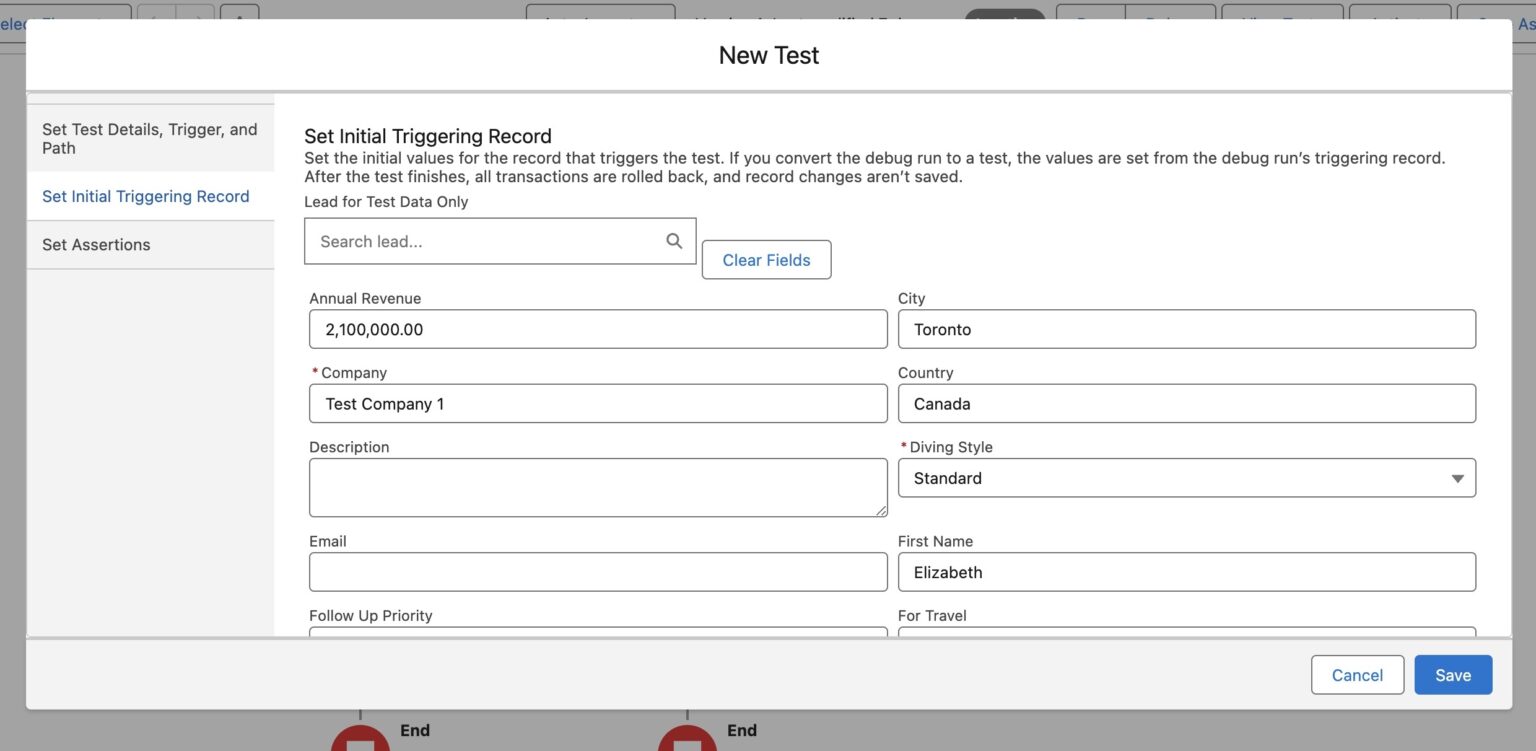
STEP 2: Set Initial Triggering Record
- In this step, we will set up the test data. It’s important to note that the record created or updated during the flow tests will automatically be rolled back once the test concludes. Therefore, it will not be permanently committed to the Salesforce database after the test run.
- For our test case, we will create a new lead record with the following details: the name “Elizabeth Tareen,” a rating of “Hot,” located in the region “North America,” and associated with “Test Company 1.”
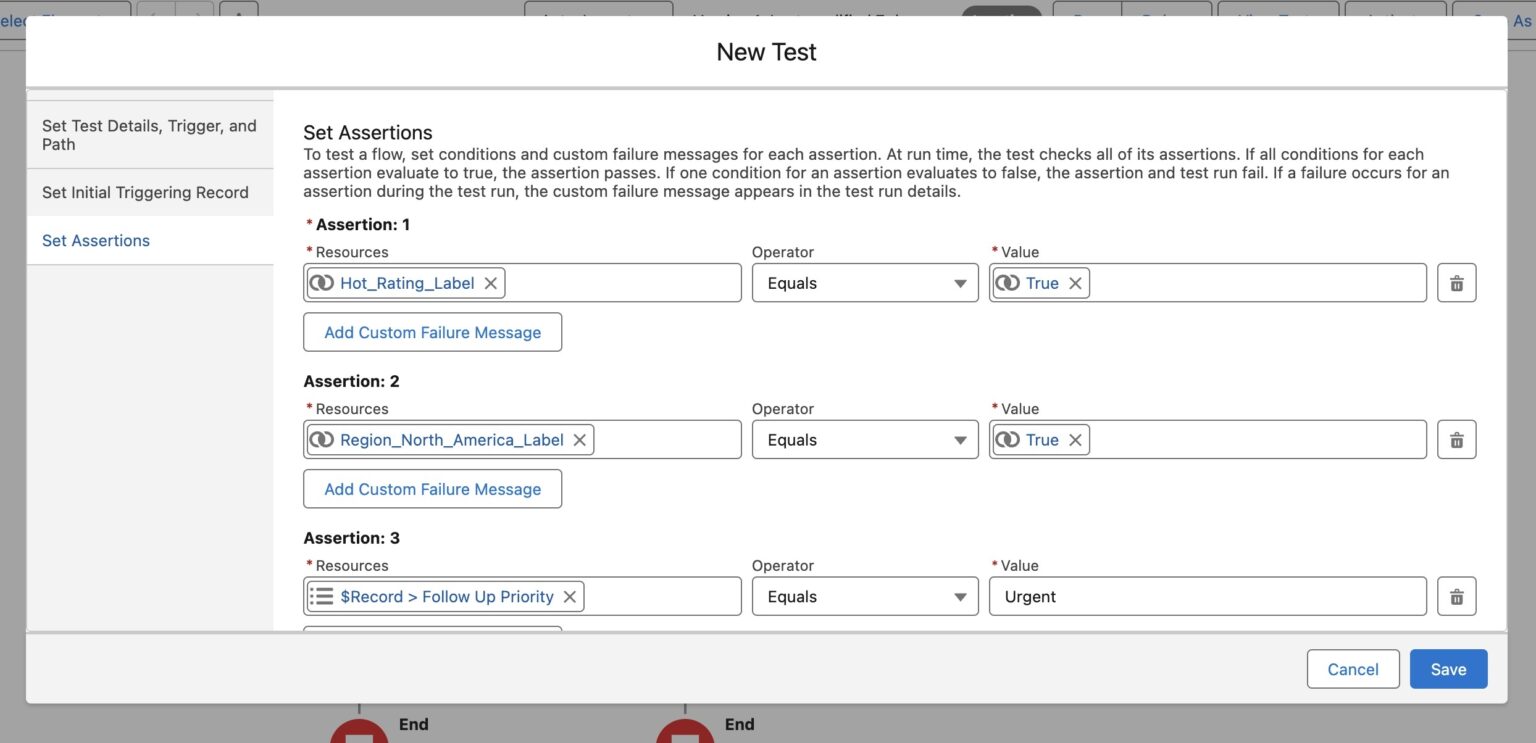
STEP 3: Set Assertions
- Assertions are checkpoints within a test designed to verify that specific conditions are fulfilled. They are crucial for validating that the outcomes of a test match the expected results.
- Users can include one or more assertions within a test to ensure that the flow follows the expected path. Additionally, assertions can be used to verify that specific fields are set to predetermined values. During the test run, the results are compared against these assertions; if the actual outcomes align with the expected results outlined in the assertions, the test is considered pass. If they do not match, the test fails.
To save your test, simply click the “SAVE” button. If you wish to execute a test, use the dropdown menu next to the test and choose “Run Test and View Details.” To run one, multiple or all tests simultaneously, select the checkboxes next to each test and then click the “RUN” button located at the bottom right corner of the screen.
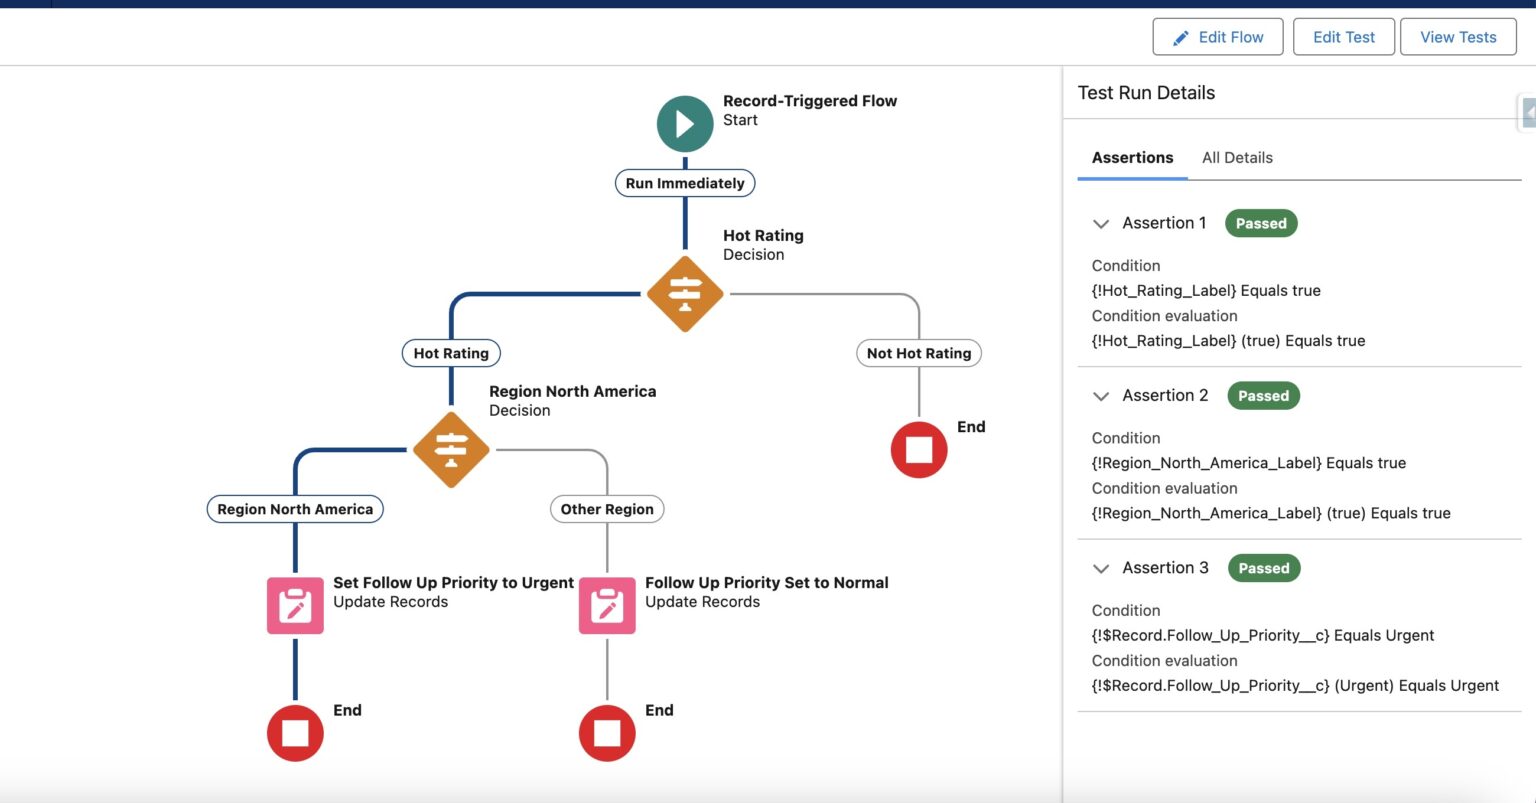
After executing the test, Salesforce Flow Builder will display the specific flow path that the test followed. Additionally, it will provide the actual values from the assertions, allowing you to verify the test outcomes against the expected results.
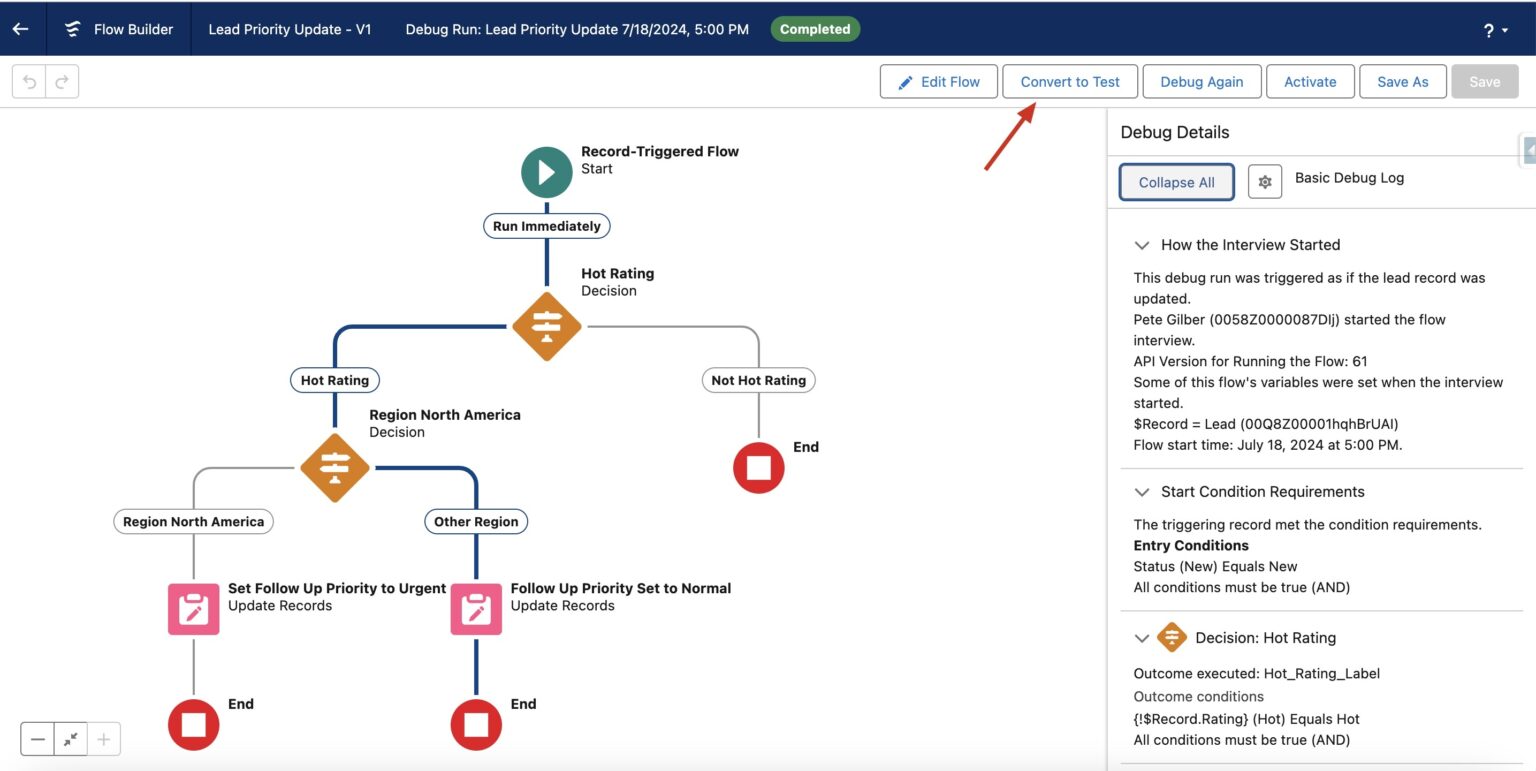
2) Convert Debug Run to Flow Test
- When debugging a flow, you typically configure various parameters and inputs. What’s convenient is that you can easily transform a debug run into a flow test with just a click. After completing a successful debug run, look for the “Convert to Test” button located at the top-right of the page, adjacent to the “Edit Flow” button. Clicking on “Convert to Test” will bring up a modal where you can convert your debug run into a flow test.
- Do note that if your debug run fails for any reason, the “Convert to Test” button will be disabled (greyed out), and you won’t be able to initiate a new test from that run. Ensure that your flow successfully completes the debug run before attempting to convert it into a flow test.
- Add a meaningful label to your test and configure any necessary assertions to validate the expected outcomes. Once you’ve set these up, save the test and run it.
And there you have it! By now, you should not only have a good start to understanding the what and the why of Salesforce Flow tests, but also know how to create and configure them.
Always keep in mind, thorough testing is your go-to strategy for ensuring your Flows stay solid and dependable. So, make it a habit to test, test, and test some more before anything hits production. Stick around for more tips and insights on mastering Flow testing. Happy testing!
Need some more advice on testing your automations within Salesforce? Let’s chat!

Author: Nupur Patel
Automation Specialist & Junior Salesforce Developer at Lane Four
Let's chat!
